Showing posts with label Stampin' Up! UK. Show all posts

Wednesday, 22 July 2015

A Tiny Treat Box and a whole Bundle of other super Stampin' Up! deals to be had!

Hello!

Today I have a quick to make, little gift box to show you. It uses the Stampin' Up! Tiny Treat Boxes which I think are just adorable! The boxes come in a pack of 25 for just £6.50/8,50€ so are great value at only 26p/€0,34 each. They are food safe and acid free. Once assembled they are 5.1x5.1x5.1cm in size (i.e. 2" x 2" x2"). They are perfect for small gifts such as jewellery, sweets or chocolates. 

I have decorated mine with one of  the gorgeous Go Wild patterned paper stack papers - I love that the little polka dots on this are actually little hexagons, not circles:


I wanted to reflect the hexagon 'dots' on the paper in my decoration/label on the top of the box - and so the Hexagon Punch and the Six-Sided Sampler stamp set were the obvious choice! I have found this stamp set and punch combo so useful and have used it on so many different projects. You can get the Stamp Set and Hexagon punch together in a bundle and save 15% too! Click here to see this and the other bundles that are available with the 15% saving.
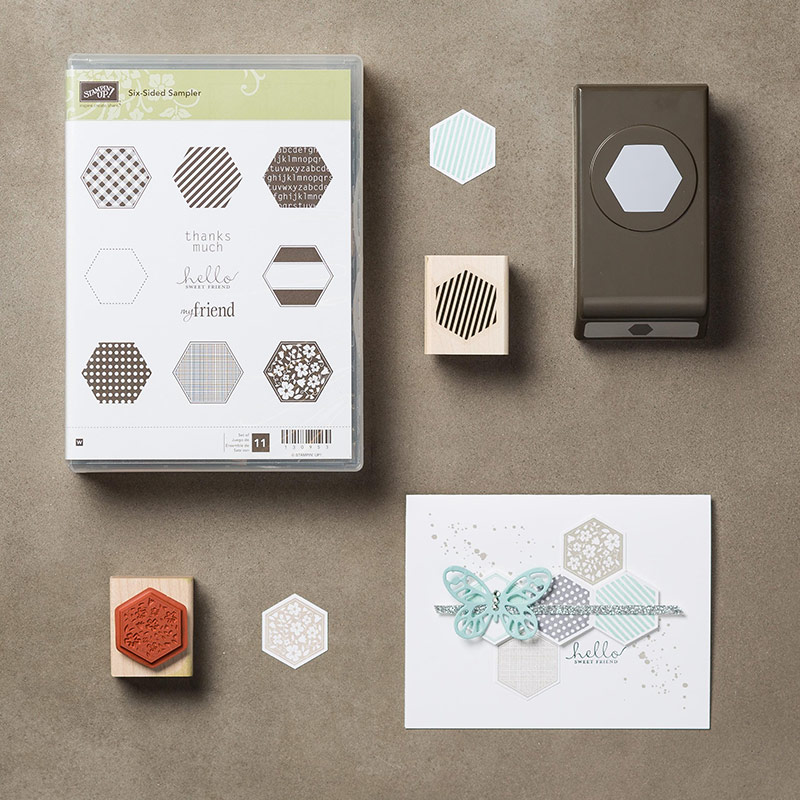

I stamped the bar-pattern hexagon on a scrap of Whisper White cardstock with Tip Top Taupe ink, then using my Stampa-ma-jig,  I stamped the 'hello sweet friend' stamp in black Memento ink in the centre bar of it;  then punched it out with the Hexagon Punch. The black banner behind the hexagon is actually two separate pieces, punched using the Banner Punch! I do love that little punch!

The sides and lid of the box each have a 4.5x4.5cm  (1 3/4"x 1 3/4") square of the paper glued onto them with Tombow liquid multi-purpose glue. I punched a half-circle out of one of the squares using my 1.9cm/3/4" circle punch, so that it did not cover the thumb hole on the front of the box:


Here is a picture of how the hexagon label on the lid is constructed, the hexagon is on a dimensional and the two banner punched shapes are glued onto the lid's dsp square underneath the hexagon and lined-up to give the illusion of one, longer banner:


And here is how it looks like from the top:


I love how Stampin' Up! products coordinate so beautifully - in fact it was this coordination that drew me to Stampin' Up! in the first place! Not only are the colours available in ink, card, papers, accessories and ribbon etc, but a lot of their stamps have a matching punch that coordinates beautifully with them. I also love how Stampin' Up! make it even easier by providing us with bundles of products at a discount too!

Talking of discounts - this week's Weekly Deals are out today and there are some corkers in it this week... looks like I'll be putting another order in this week to get myself some of these items whilst they are available at the discounted price. Again this week's deals have a limited level of stock allocated for the discounted price in the deal - and once this allocation is all sold, then the price will revert to the regular catalogue price, so if you want to grab these bargains, don't delay, put an order in TODAY!!


Click here to see these items in more detail and to purchase them now! 

I must confess, I hadn't even noticed that there was a Smoky Slate Natural Chevron Ribbon  - how did I miss that?! It's gorgeous! I have been meaning to get some of the White Perfect Accents for a while now, as I've seen other people use them in their projects and they look amazing and my stock of ribbons is quite low at the moment, so I will definitely be adding the Calypso Coral Seam-binding ribbon to my next order too, as it will go beautifully with the Pretty Petals DSP stack papers which I recently bought. I also want to try out the metallic foil doilies too... 

Remember that if you place an order online with me before the end of July 2015 and you use the Hostess Code FQZ4JER4, then I shall send you a thank you gift in the post in August.

Thank you for taking the time to read my blog post today. I hope you like today's project? Do leave me a comment, as I love to hear from you. The comments are moderated by me before they are published to avoid spammers leaving links to their dodgy websites - you'd be amazed by their hilarious attempts and what they say! Hehe! So, do not worry if you don't see your comment appear straight away, I shall get to it eventually and I appreciate every one of your genuine comments, thank you!

Until next time folks, happy crafting!

Lucy x

Saturday, 18 July 2015

Stamping, sparkly stars and strawberries - a perfect recipe for a card class!

Hello, today I want to share with you some photographs taken at my class on Thursday. It was such a lovely morning, we all had such fun - shame that a couple of my lovely regulars couldn't make this one - you were missed, ladies! 

I had already planned for us to make a Christmas card using some of the English Garden papers, however, when I saw the Weekly Deals announced on Wednesday morning, I decided to challenge myself to make a Christmas card using several of the items that are on offer this week and was so pleased with what I came up with that I went with the new card design. The English Garden Christmas card will wait until the next class!

Normally, I bake cakes for my card class, but I had a double epic fail on Wednesday evening - firstly I was so busy doing other things that I only realised at about 10.30pm that I had forgotten to bake the cakes, "no problem", I thought, "I'll just bake the cupcakes now; won't take long..." Hmm... went to the cupboard to get out the ingredients and realised to my horror that I had run out of flour! Nooo! I use gluten-free flour, but I thought, "no problem, I'll just go and buy some normal flour from the corner shop and just not eat any myself..." Nope! Too late - the corner shop shuts at 10.30pm... So, what's a girl to do? Raid the fridge and take some beautiful English strawberries instead! Yum! Can't beat British strawberries at this time of year!


They were SO good - and as they had been out of the 'fridge for a while before we ate them, mid-class, they seemed extra delicious and packed with flavour! Yum! Just what we needed, with our cuppas after making the first card!

Here are the cards that my ladies made. I have wanted to do this type of fold for a while now and decided to use the Stars Framelits to cut the window out instead of the more traditional square or circle. I love how each person's card is different - the one on the bottom right is going to be a birthday card for a male, so it shows how versatile the card can be!


This next two photographs show what the card looks like from above, so you can see how it stands up and how the mechanism works! 


I love how the stars all look so different. That Everyday Chic Designer Washi Tape is just gorgeous - and, like the Stars Framelits, it is in this week's Weekly deals too! As are the gorgeous Metal-rimmed Pearls that can be seen in the centre most of the stars above.

Here is another shot of those yummy strawberries, along with the card I made!


The black stars and the sentiment are from the Festival Of Trees stamp set and the silver sparkle is courtesy of the Silver Glimmer Paper. Love that stuff!

Anyway that is it for today - I am running a bit late today, so, sorry that this is a bit rushed and shorter than my normal posts.

You can look at the Weekly Deals here. Don't forget if you place an order online with me before the end of July 2015 and you use the hostess code of FQZ4JER4 (and don't choose the "no contact" option!) then I will send you a little thank you gift in the post in August!


Thank you for taking the time to visit my blog and read through my post today.

Until next time, happy crafting everyone!

Lucy x


Wednesday, 15 July 2015

Some Pretty Petals projects CASED from the Stampin' Up! Catalogue and some pretty good deals to be had too!

Today I have another couple of versions of the Six-sided Sampler card that is on page 105 of the Stampin' Up! 2015-16 Annual Catalogue, similar to my recent CASE that I based my team training swaps on.

Here is the original card that is in the Catalogue. I think it is so pretty:


And here are the CASED versions I showed you recently, that I made for my Inspiration Station based on the Go Wild Designer Series Paper (DSP) Stack. (The second of these photographs shows my 3x3" swaps.):


I so love the layout of the Stampin' Up! card and I really wanted to try it in other colourways. I recently bought a stack of the 6x6" (15.2x15.2cm) Pretty Petals DSP, which, like the Go Wild stack has a matching cardstock pack to go with it. The DSP Stack has 48 sheets of gorgeously patterned papers (4 sheets each of 12 double-sided designs) for a bargain £7.25/9,75€. The Pretty Petals A4 Cardstock Pack has 8 sheets each of Calypso Coral, Old Olive and Mint Macaron (so 24 A4 sheets in total, for £6.50/8,50€) - perfect for making multiples of your projects and for getting the most out of your paper stacks too!

I have been itching to use the Pretty Petals papers ever since I got it, but haven't had a chance until now - here is what I made yesterday:


Aren't those patterns just gorgeous - and I've only used a few of them in these two cards. I decided to just use three punched hexagons of the paper on the Mint Macaron card - mainly because I couldn't decide which of the remaining gorgeous patterns to use for the two extra hexagons - there are so many fabulous combinations and they all look good!

I used the Silver Metallic Thread, Silver Glimmer Paper and Silver Glitter Adhesive on these ones, instead of the gold, as per the black and white cards above. I also used Very Vanilla as the mat layer on the card, as the Pretty Petals DSP is vanilla-based instead of white-based. I love how muted and vintage these look with the use of the Very Vanilla and I wonder why I don't seem to use Very Vanilla more often in my projects? Silly really, as it gives such a nice, soft look, don't you think?

I am going to use these as one of my next class projects. I will make an Old Olive version when I demonstrate to my class attendees how to make them, so that they can choose which of the three base colours they prefer. I might even offer them the option of making the Go Wild black/white/taupe version too!  I love how just one example shown in the catalogue, has inspired so many versions of effectively the same card, but with such different outcomes. Just goes to show how versatile Stampin' Up! Products are and how beautifully they coordinate with each other!

Which one is your favourite? I'm not sure I can decide!

Here are a couple of close-up shots to show you the butterflies in more detail - I have used the Bold Butterfly Framelits SO much since I got them, they are so pretty and so useful:


I love how the Silver Glimmer Paper, Glitter Adhesive and Metallic Thread shine so prettily in these photographs. They really are that shiny in real life - sometimes it can be hard to capture just how shiny they are in photographs. It was such a dull and gloomy day yesterday; I had to resort to using my daylight lamp when taking these pictures, rather than my usual preference of diffused, natural daylight. A happy "accident" perhaps? - They do say that things happen for a reason! Hehe!

Talking of happy things - today we have a new set of Weekly Deals out! Again, there is only a limited stock of each item, so once that item's allocation has sold out, the deal price will no longer be available and the item will revert to its normal, full catalogue price.  So hurry up and place that order if you don't want to miss out on the discounted prices! I think that there are some fantastic products this week. Come and take a look:


I have the Stars Framelits and have used them so much - and not just for Christmas projects. Having seen what is in this week's deals, I have had an idea for a card that uses the Stars Framelits and the Every Day Chic Designer Washi Tape, plus the Metal Rimmed Pearls... so come back soon and see what I come up with!

To buy any of these Weekly Deals items click here and you will go to my online shop. Remember to add the host code of FQZ4JER4 (for this and any other online purchases from me before 31 July 2015) and I will send you a thank you gift in the post in August. To get your gift, you will have to make sure that you un-check the "no contact" option, otherwise I will not be given your contact details and will not know to whom or to where to send your gift! If you have any questions, please do contact me to ask and I shall be happy to help!


Thank you for taking the time to visit and read my blog post today. I do hope you have been inspired to go and do some crafting yourself. Do leave me a comment, as I would love to hear what you think of today's projects.

So, until next time, happy stamping everybody!

Lucy x

Monday, 13 July 2015

Onto a winner with Stampin' Up!'s Garden In Bloom stamps!

I have decided to take a break from the Tip Top Taupe, Black and Whisper White colour scheme from my recent team training inspiration station projects and inject a bit of colour today!

At our team training events, one of the most popular things of the day is always the raffle, which is usually jam-packed with all sorts of fantastic Stampin' Up! goodies... (Thanks, Michelle!)

Normally, I rarely win anything in raffles, but I still optimistically buy some tickets in any raffle I'm asked to take part in... In the past if I have won anything, it's been notable for it's uselessness - think winning a turkey in a Christmas raffle when you don't eat meat and the rest of your close family is living overseas, or, winning a "romantic dinner for two" at a local gastro pub - two weeks after splitting up with a boyfriend... Yes folks, in the past I have been THAT lucky! I kid you not! So, imagine my total and utter delight at winning not one prize in the team raffle, not two, but THREE prizes! Yes THREE PRIZES... of Stampin' Up! goodies too! Whoopieeee!! I couldn't quite believe it, and felt a bit greedy for winning three... but, still took them - hey, I deserved a bit of raffle luck for a change, people, don't judge!! ;) 

One of the three prizes I received, was the fabulous Garden In Bloom stamp set - a photopolymer stamp set that has several flowers, leaves, a stem, a couple of butterflies and a very cute bee as well as some lovely sentiments amongst its 20 stamps:

Garden In Bloom Photopolymer stamp set 139433 £23.00/30,00€
I was so excited to win this as it was one of the next items on my "wish list" of new Stampin' Up! goodies to buy for myself and my classes! I love the two-step stamping and multitude of possibilities the many different stamps give you for your cards and other paper-crafting projects. Each of the flower and leaf stamps has a little built-in tab arrow, that doesn't get ink on it, but shows you which direction your stamp needs to go in. For example if you use the largest flower outline stamp with the arrow facing straight up (in a 12 o'clock position), then you know that when it comes to the next layer of the stamp, you just face that stamp's tab at the 12 o'clock position too and then stamp within the flower outline so that your petals will all match up beautifully. Some of the stamps you can instantly see which is the correct way up, but with others the little tab arrows save you no-end of bother! 

Here is what I made with my first try:


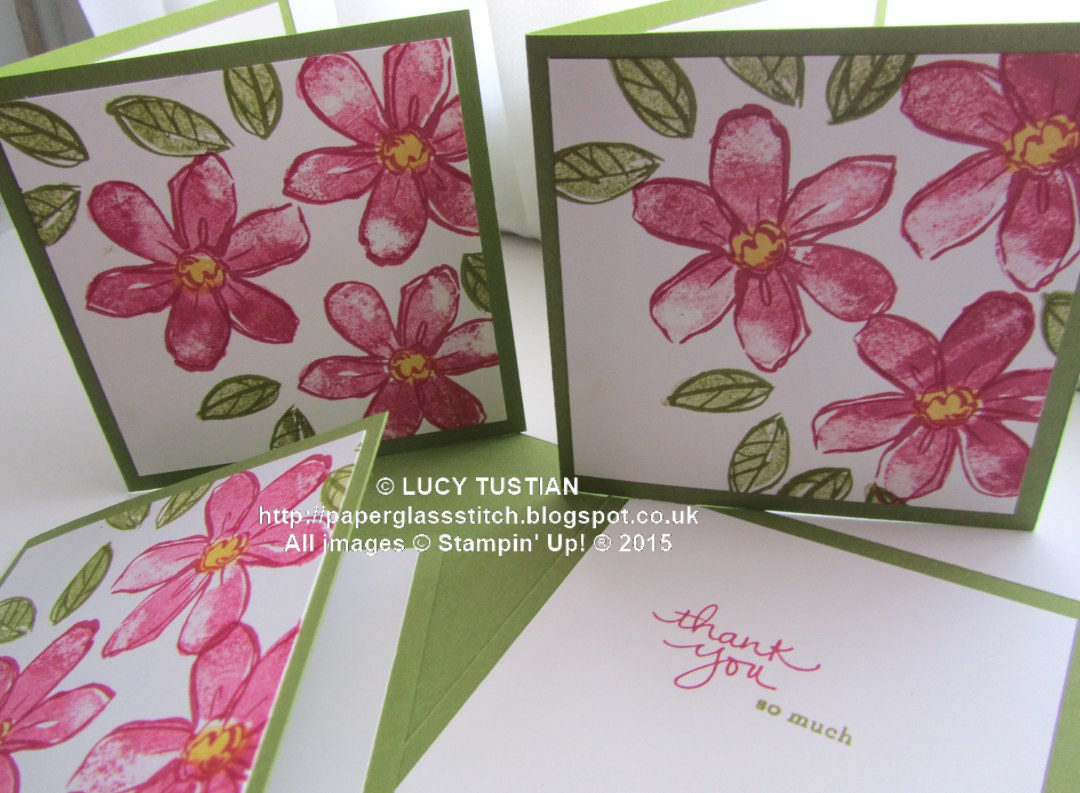
I made a series of square cards, all with Old Olive bases and Whisper White mat layers. I kept my colour palette to Rose Red, Old Olive, Daffodil Delight and the Tuxedo Black Memento ink. The cards are approximately 10cm (4") square. The outlines of the flowers and leaves were stamped directly from their ink pads, but the "solid" insides were stamped off on my grid paper first, before being stamped onto the card. The yellow flower centres are stamped with the same little stamp that the yellow bumble bee body was stamped with. I'm not sure if it was designed to be for both, but it definitely fits both!


On these two cards (above) I kept the layout pretty much the same but used differently-sized leaves on each. I think I much prefer the card without the sentiment on the front and decided to stamp on the inside of that instead:


The sentiment inside these ones comes from Endless Thanks. I just love the mix of the hand-written-look font with the smaller, typed-style font. I think I shall get a lot of use out of the Endless Thanks set as it has lots of different sentiments as well as a lovely scrolled banner and several flowers, leaves and a tiny heart in it too:

Endless Thanks Photopolymer Stam Set 138796 £14.00/19,00€

Isn't that cute? For the next card, I stamped a single large flower and bent the stem stamp into a gentle curve on my acrylic block, before stamping it. (So easy to do with photopolymer stamps!) I really like the sentiment on this card. I thought it would make a lovely thank you card too, as you can see from the inside layer, shown below:


I love the little cute, almost blotchy, butterfly, don't you? It is so dinky!

I stepped up the next card a little, using the same curved stem and large flower, but this time adding the larger leaves, a bumble bee and an extra flower. Shh... don't tell anyone, but the small flower is hiding an inky green finger print, which I partially disguised in one of the little leaves, but then needed something else to balance it all (remember: "it is not a mistake, it is an opportunity for embellishment!"). I stamped the little, three-step flower on a scrap piece of Whisper White and fussy cut it out with my paper snips and stuck it onto the card with a glue dot. The arrow tabs are especially useful when stamping this little flower...


More leaves and this lovely sentiment taken from Butterfly Basics stamp set, made the final touches to the inside of the card. Job done!

I hope you have liked today's cards? I think that you could make several  of these and put them together in a little hand made box, for a very pretty birthday or thank you gift - and of course there are endless possibilities for using different colours to get quite different looks.

These will be my July thank you cards, so if you order from me this month, whether online, at a class, by email, or, in person, you will receive one of these thank you cards from me. (If you order more than once, I shall make sure that I make your cards in different colourways, so you don't end up with several the same!0


Remember if you place an online order with me via my shop during July 2015 and you  use the hostess code FQZ4JER4 when you place your order, I shall send you a little gift in the post as a thank you in August.

Well, that's it for today. Thank you for taking the time to visit my blog and reading this post. I hope you have liked today's projects? I'd love it if you left me a comment to let me know what you think and which card design you prefer the most!

Until next time, happy stamping everyone!

Lucy x


Saturday, 5 April 2014

Stampin' Up! UK's "Easter Treats" Youtube video filming day...a behind-the-scenes-account!

A few weeks ago, I received a 'phone call from the lovely Paula Gorry at Stampin' Up! UK's HQ asking me if I'd like take part in filming a Stampissimo "how to" video later in the year... erm... YES PLEASE!!!! What an honour to be asked!! Wow! How exciting...I love a challenge! Great, I thought, it's a few months away, plenty of time to design some fabulous projects... and go on a diet, lose a couple of stones, get my hair done, lose the winter pallor etc etc...well, you know, us girls are never happy about what we look like, are we?! LOL!!
 
Well, to cut a long story short, I had another 'phone call a little while later asking me would I mind coming to the rescue, at short notice, as the lady they'd booked for the 19th on March couldn't make it as she was really poorly and would it be OK if I swapped filming dates with her... I immediately said yes, of course! (eek no time for the diet...but yey, less time to get nervous about it!!) and only 10 days later, I found myself on a train to the UK head office in High Wycombe!

Paula kindly met me off the train and after a quick en route visit to a well-known home and garden store, to get some plants for the brand new film set in the office, we arrived, with me being rather too nervous but very excited to see the head office for the first time!

The film set had only arrived and been set up a couple of days before the filming day - not that you would be able to tell - Kelly had done an amazing job of making it all look awesome!

Here is the lovely Paula on the fabulous set:


Doesn't it look swish?! The lovely "Ben and Jerry" as they are fondly known, (it's Ben and James, really!)  were our camera crew for the day and their calm professionalism and expertise really helped calm my nerves no end! I was still shaking with nerves though when we started filming! I was convinced that I'd say something completely stupid, trip over something, or, that my bad cough would hamper it all... thank heavens for their amazing editing skills is all I can say!! (Thank you guys!)
 
Here are a couple of photos of the set up of the filming equipment...


Those lights were very bright! There were three cameras, one in front, one to the side and one directly above the desk, looking down on where I was to make the projects... and here is my view from behind the desk... how scary is that?!!


No, not the sight of Ben and "Jerry", nor the lovely Kelly, but, to be in front of so many cameras...all pointing at me, I mean!! Waaaaay out of my comfort zone!! I much prefer to be behind a camera... Eek! Shudder!
 
Here are a couple of photos that were taken before filming started, whilst the guys were still setting up all their amazing cameras and recording equipment, I think you'll agree that I'm only just managing to mask my "scared bunny in headlights" feelings of panic in the photos of me with Paula and with Kelly!! LOL! I was so nervous...


Here are a few more pictures of the set throughout the day:
 
 
Oh dear -one day I will learn how to craft tidily!! And the left-over bowl of choccy eggs & veggie jellybean eggs (in the top left of the picture above) was considerably more depleted by the end of the morning than this - well, it is important to do a "quality control test" of all treats and after all, an army marches on it's stomach, so they say!! hehe ;O)


I love the Celebration Banner across the front of the desk that Kelly made - especially the dangly strings of circles between the letters... which reminds me, I've still not got around to making my banner up yet - oops!
 
Here is a group photo, taken by Kelly with my camera, after all the filming had been done - phew, relief! hehe:
 
 
And another:
 
"But who is the handsome chappy on the right?", I hear you ask! "Nooo, not the one in the DroogMedia t-shirt , [sorry, James!!], the handsome, furry chappy, sporting the dapper red bow tie": Ahh, well, that's Mr Manoo, of course.... the Head Office mascot, who is very well-known in demo circles!! In fact I was completely star struck when I met him that day... but I managed to get a 'selfie' of the two of us and I think it is actually my favourite photo of the whole day:


:O) Hope you've enjoyed this behind-the-scenes account of my exciting day at head office? I had a fantastic day - despite all my nerves and terrible cough! A HUGE thank you to Stampin' Up! UK, Paula Gorry, Kelly Francis, the lovely Ben and James Wolstenholme from DroogMedia and Mr Manoo, who all helped make the day so enjoyable and fun - thank you!
 
 
And finally, click here to see the video - I hope you enjoy it and like all the projects which I designed and make on it - and please come back again soon, as I shall hopefully be  posting a tutorial for the Easter Bunny Gift Bag on here in the next few days!
 
If you are in the UK, France, Germany, The Netherlands or Austria, then you can buy any of the products used to make these projects, from my online shop here and get them shipped straight to your door!
 
Thank you and happy crafting everyone!
 
Lucy x